Recent › Forums › CITY CABINETS › Unfinished doors – presanded to what grit?
- This topic has 5 replies, 2 voices, and was last updated 6 days, 15 hours ago by
ChadBarker.
-
AuthorPosts
-
-
What grit are the unfinished doors presanded to?
-
Doors are sanded to 220 grit.
-
Weird. Some of the doors feel much rougher. Not sure why. Maybe humidity causing some grain to rise? It’s weird because some doors are very smooth and appear to be 220 grit.
-
It is going to depend on the wood type you are using.
Harder wood species like red oak, walnut, and similar woods are going to feel different than alder or cherry. Maple will usually feel the smoothest and most pristine because it has the least porous face.
All of our doors go through a massive multi-stage sanding process with wide belt sanding and orbital sanding to bring the door to its final thickness. Even our outside-edge detail machine sands the profiles during the same pass that applies the door’s edge detail. They are then hand-sanded and detailed by a real person.
Regardless, you are going to be sanding between each coat of finish you apply to the doors anyway, so minor differences in surface feel between wood species should not be an issue.
It is literally impossible for our doors to arrive unsanded.
-
Hannahz5
(I’m the same person as the original poster, the website captcha is not allowing me to sign in).
Huh, I have Maple (unfinished slab doors), and a few of the doors have very rough open grain sections. Other doors show strong horizontal saw marks. It must be an issue with the veneer quality.
I am using an hard wax stain (rubio), so the very rough sections are more problematic than they would be if I were using a multiple coat of a self-leveling poly.
-
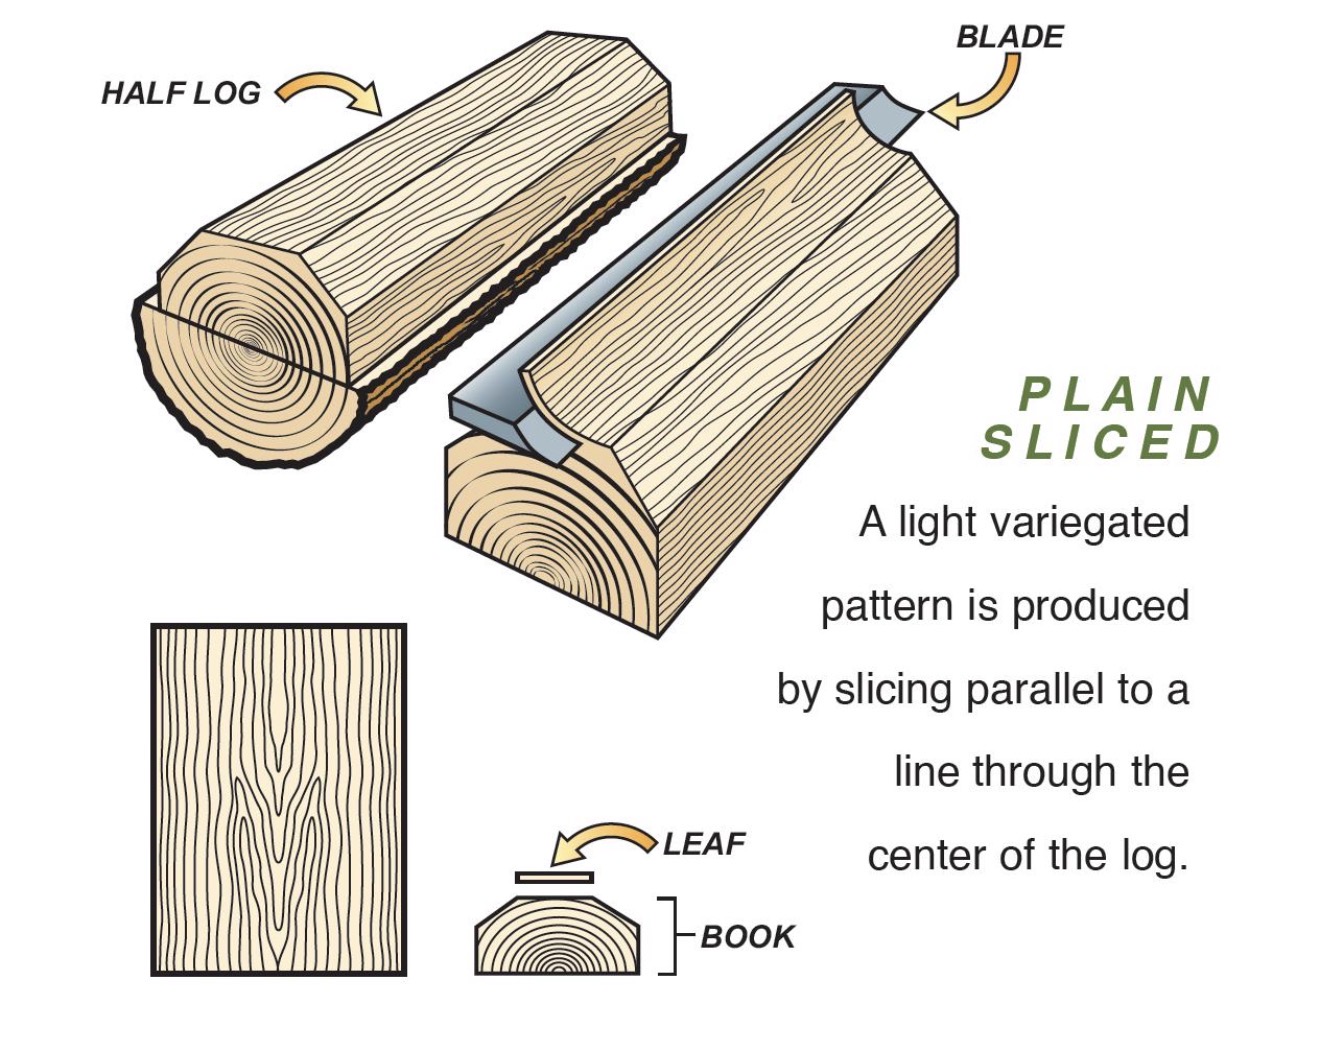
Slab maple doors (plywood slab doors with banded edges) are made from maple veneer over a plywood core. The panels come pre sanded from the mill, are cut to size, edge banded, and then hand sanded with an orbital sander using 220 grit to clean up the seams after banding.
There should not be saw marks, as sheet veneers are not cut using a saw blade. If a stain is revealing swirl or “saw like” marks, it may be highlighting the orbital sanding pattern from production. In that case, a light once over with a higher grit sandpaper before staining may help reduce the visibility. Lighter stains tend to be much more temperamental and will expose surface inconsistencies far more than darker stains. Combine this with the fact that each real wood veneer species accepting stain differently and you can see why pros charge a ton for hand staining.
Personally, I prefer selecting a wood species that naturally has the color you want and then applying a clear finish over the top. This approach makes future repairs much easier if damage occurs, since touch ups are generally more forgiving than trying to match a stained finish.
We are currently in the final stages of experimenting with a “weathered tint” finish. This is essentially a clear coat with a very small amount of white pigment, primarily titanium dioxide, mixed in. The goal is to soften wild grain variation and reduce the warmth and yellow tones of the underlying wood.
This works especially well on lighter species like maple, giving it a cleaner, more natural “fresh maple” appearance without the yellowing that can develop over time. Think of it as a very lightly toned, semi transparent finish, just a hint of white, not paint.
Darker wood species can benefit as well. The tint helps reduce color variation between veneer flitches, creating a more even appearance from door to door. For example, you could start with walnut and slightly brighten or soften it to resemble the tone of a medium stained maple.
I prefer this method because our finishing line applies the exact same amount of tint and finish to every door. That consistency removes the variability that comes with hand applied stains, where changes in spray technique or application rate can create noticeable batch to batch differences.
Attachments:
-
-
AuthorPosts