
Recent › Forums › CITY CABINETS › Tamarack Stain On Walnut
- This topic has 13 replies, 3 voices, and was last updated 1 week, 5 days ago by
ZackC.
-
AuthorPosts
-
-
February 5, 2026 at 6:03 pm #4006
I purchased walnut slab cabinets in Tamarack from City Cabinets (which are gorgeous btw), and I’m trying to match this tamarack stain for a custom front face on a cabinet I’m building. Anyways, I bought the tamarack stain from you guys as well, but I cannot get it to match at all. It’s far too warm/light compared to the doors of the cabinets I bought. I’ve tried several methods and used the recommended poly as well as other types/colors as well.
Is there a particular kind of walnut that’s used for the veneer? Any help or tips would be greatly appreciated, as this custom front face will be next to these cabinet doors from you guys and I really need them to match.
-
February 6, 2026 at 11:39 am #4018
Is the application making the stain appear blotchy? Do you have a photo you could post?
There are several ways to apply stain. Our process is not the easiest to replicate on site, and depending on the tools you have available, achieving a perfectly uniform match can be difficult. That said, you can get extremely close. Applying stain with a foam brush or rag, is more of an entry-level approach and can result in uneven absorption, especially across different wood types.
Do you have a sprayer? Ideally, to best match our process, you would use an HVLP sprayer and apply two separate light coats of stain, allowing each coat to dry in between. This closely mirrors how we apply stain in-house: we spray using a four-gun cabinet system, stack the parts in an oven for approximately 12 minutes to allow the stain to set, then force-dry them using heated air and infrared light—similar to our final topcoat process on cabinet doors. Applying stain in two light passes helps maintain uniformity, as light spots can develop with hand application or inconsistent spraying.
This is the sprayer I purchased a while back for personal projects. The cost is quite high, and if you’re only trying to match a single door, it’s likely not a practical option:
3M Performance Spray Gun Starter Kit, 26778, Includes PPS 2.0 Paint Spray Cup System, 15 Replaceable Gravity HVLP Atomizing Heads, Air Control Valve
If budget is a concern, Harbor Freight can be a good option for an inexpensive sprayer. Another alternative would be to try a basic spray bottle from Home Depot. I haven’t personally tested this method, but the theory is sound and it may work reasonably well to lightly mist the stain and achieve a more even application.
-
This reply was modified 4 months ago by
ChadBarker.
-
This reply was modified 4 months ago by
Attachments:
-
This reply was modified 4 months ago by
-
February 9, 2026 at 4:19 pm #4031
The stain goes on nicely, not blotchy. It’s more the color itself, see photo. It always ends up lighter/warmer. So I’m guessing it’s the actual wood?
Attachments:
-
February 9, 2026 at 4:20 pm #4033
I should mention my test piece on the left is also walnut like the cabinet.
-
February 10, 2026 at 12:30 pm #4037
The bottom portion of your wood sample does appear a bit light. Most black walnut is typically fairly dark, and while the grain of your sample does look consistent with walnut, the color of the veneer itself is on the lighter side.
Normally, I would say that most walnut veneer is sourced from the same mills in the eastern United States. However, I have been seeing more products advertised from a wider range of sources lately, so I can’t say with certainty why this particular piece is so light. It appears to resemble walnut sapwood, which is typically taken from the outer portion of the walnut tree.
I will post a few photos of the walnut plywood we currently have on the shop floor from another project so you can gauge how dark the walnut veneers we are using actually are. I will also include a reference image showing walnut sapwood alongside the range of typical walnut color variation. That said, veneered walnut is almost always sourced from the heartwood, which is the most desirable part of the tree, so I’m not sure why veneer would be taken from sapwood—this is very uncommon.
Please note we sell plywood doors and drawer fronts by themselves over on barkerdoor.com. They are not expensive.
https://www.barkerdoor.com/Slab-Flat-Wood-Cabinet-Doors-s/54.htm
Attachments:
-
February 16, 2026 at 3:55 pm #4058
Thanks for the photos! Yes, that is raw walnut you pointed to. Here’s some more pictures of the raw walnut I have. I laid down my testing piece on top for some reference. The stain color looks great until I put it next to the existing cabinets.
Attachments:
-
February 17, 2026 at 3:56 pm #4071
The raw material looks good. Have you applied the clear coat over the stain on that sample? The stain usually tones down once the clear top coats are added, so that may be why the color appears a bit stark. Our piece has the final top coats applied, which blend the underlying stain and slightly soften the contrast.
-
February 19, 2026 at 7:01 pm #4077
Yes, the test pieces do have polycrlic applied in clear satin as the clear coat
-
February 23, 2026 at 1:21 pm #4106
Hmm, yes, then it would likely be either the natural color variation of the underlying walnut or the process in which the stain is being applied.
Perhaps adding additional coats would help achieve a closer match. We spray all stains onto the panels, and then they sit in a stacking oven for about 12 minutes while the stain slowly dries. This spraying technique allows more stain to remain on the surface, whereas wiping tends to remove a significant amount from the face.
-
May 26, 2026 at 9:18 am #4628
Casey
It was in fact the undertone of the walnut wood I purchased. I did buy a sprayer and while that did make it darker, it was still too warm/red. I ended up doing one layer of a green wash (used a diluted green stain) to counteract the red tones, then used the tamarack stain. I also noticed the satin polycrilic was too shiny to match, and the matte one was much closer, but ended up doing a 90% matte to 10% satin ratio of the polycrylics to get it to match spot on. Now that I got my test pieces to match, I can proceed. Thanks for all your help!
-
May 26, 2026 at 10:50 am #4629
Nice, this is great feedback on stain applications.
We are currently working on some new tint options this month. The issue with stains is that they can be problematic to apply in the field, especially on existing millwork or other on-site items.
We have made some progress with adding pigments directly into the clearcoat finish, which allows us to skip the stain application step before the clearcoat is applied. This helps tone down the natural grain and color variation of the wood, making it possible to either lighten or darken the material in a much more consistent way. The underlying grain and color tone become less dominant in the final look.
Most recently, we tested what we are calling a Weathered finish. This is a clearcoat with a small amount of Italian-made titanium dioxide added as pigment. The effect is that it softly washes out the color of the material while still allowing some of the wood grain to show through, almost like a subtle mask. It is very promising.
For the Tamarack color, we tested what we will internally call a Smoked finish. The Smoked finish is great because it creates a very tasteful, minimal layer that slightly darkens the material to mimic Tamarack, but without adding red tones.
I will post pictures of the tests so we can all review. Note that this is in testing only, we may not add these to the website, just testing for fun 😉
-
-
-
May 26, 2026 at 1:13 pm #4630
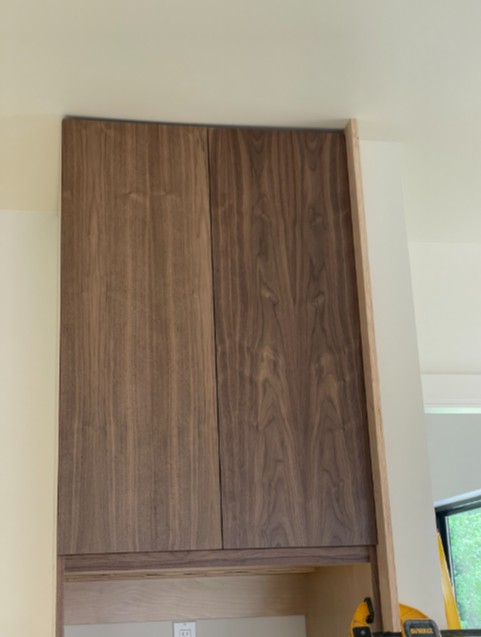
Hey Chad, I’m in a similar situation trying to match some slab plywood walnut cabinets with the clearcoat finish.
Do you guys use Quarter Sawn Walnut Veneered Plywood? Or Panel Sawn/Plain Sliced?
(Pictured below are the city cabinet panels installed)
Thanks!
Attachments:
-
May 26, 2026 at 2:04 pm #4632
We use plain sliced walnut veneers for the walnut plywood.
-
May 27, 2026 at 8:18 am #4637
Thank you for the quick reply Chad! It came just in time yesterday
-
-
-
AuthorPosts


- You must be logged in to reply to this topic.